|
MAYA, TUTORIALS, SPider walking system
ABOUT
This tutorial describes how the mel based spider walking system used in the brainbugz video works. It's not a proper tutorial yet and there are many parts of the used scripts could be made better, but until I find the time for it this will have to do :-)
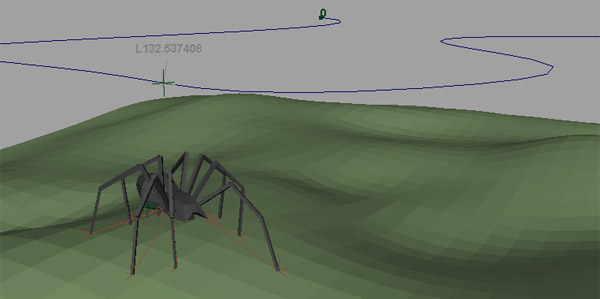
To begin, download the file below, open and play it. The spider should walk along the motion path as time progresses, adapting to the terrain. Change the motion path or the terrain to see that the motion is entirely procedural.
The Spider Setup
The spider is the example is a pretty simple proxy model - but could be replace with a more realistic one:
The top of the hierarchy is it the locator spiderController1. Under it you'll find the spider's body spider1. 8 legs are parented under the body. Each of them consists of a number of joints that form the leg, these are controlled by an ikControl with an ikHandle at the end. With it's motion the complete leg can be controlled. The individual geometry segments are just parented under these leg joints.
Procedural Animation
So, how does this beast move?
The body:
spiderController1 is animated along the motion path. The body spider1 is contrained to the terrain with the geometryConstraint spiderGC. In addition to this the normalConstraint spiderNC is sampled within an expression that controls the alignment of the spider's body. Within the expression spiderBodyExpression (which drives the body transform) you can see how this is done - noise is added to added to the body's rotation to make the motion more natural.
The legs:
Now this is where it get interesting:
If you look at the Attribute Editor > Extra Attributes section of the spiderController locator, you'll see a number of parameter - they all control how the spider leg moves. The spider animation is cyclic, the length of the walk cycle is not determined by time, but by transition along the motion path. walkCycleTransition determins the length along the motion path which is used for one cycle. All the animation controls work relative to this range. For convinience this transition length is treated as 1, so the range is normalized (between 0 and 1) and all animation controls related to timing operate in this 0-1 range. In particular these are stepStart and stepDuration, they determine when during the walk cycle a single step starts and how long it will take. So when moving along the motionPath for every leg it is determined if
a) the time is not ready to step - in this case keep the ikHandle which controls the leg planted at it's current position
b)
the time has arrived to start a step - store the current position in currStepStartPos and set currStep to 1 (this indicates a step is taken), determine an end position for the step (this is done by adding the end position relative to the body relStepEndPos to the body's position, this position is then transferred to the surfacePointLocator which is connected to a closestPointOnSurface node spiderSurfacePointFinder which in turn gives us the final end position for the current step on the surface currStepEndPos - phew!)
c) the step is currently taken (currStep is 1) - if we are stepping a simple hermite interpolation is used to compute the position of the ikHandle at the end of leg, from currStepStartPos to currStepEndPos starting with a tangent of stepStartTangent and ending with stepEndTangent. the step's progress is determined by the current progress through the cycle transition length, stepStart and stepDuration (for more insights check the "hermite" mel command)
To see how this is all achieved in practice, check the expression which drives the extra attributes of the spider controller.
So, I hope this was not too technical and gave you some insights into how this procedural animation was achieved. If you have any questions or suggestions how to made it clearer, please contact me.
Of course there is a lot of space for improvements - feel free to experiment and I'd be interested in seeing what you come up with!
DOWNLOAD
spider walking scene > spiderWalk.ma
|